40 Yard Dumpster Rental: A Practical Guide for Large-Scale Cleanup Projects
Large cleanup projects can generate far more debris than a few trash cans or small dumpsters can handle. Construction renovations, commercial cleanouts, demolition work, and major property improvements often produce bulky materials that need an efficient disposal solution. Choosing the right container can save time, reduce repeated hauling trips, and keep the work area organized.
A 40 yard dumpster rental can be a practical option when a project produces a substantial amount of waste. However, size alone should not determine your choice. Understanding capacity, acceptable materials, placement requirements, rental periods, and local disposal rules helps prevent unexpected problems once the dumpster arrives.
What Is a 40 Yard Dumpster?
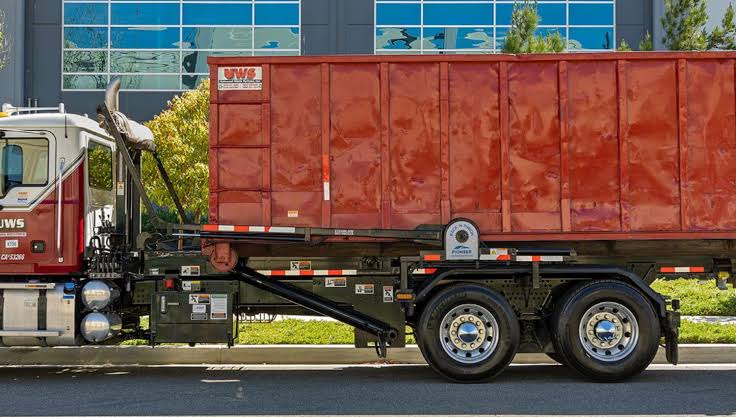
A 40-yard dumpster is one of the largest commonly available roll-off containers for residential, commercial, and construction projects. Its capacity is typically around 40 cubic yards, although exact dimensions vary between rental providers.
To put that capacity into perspective, one cubic yard equals 27 cubic feet. Therefore, a 40-yard container can hold approximately 1,080 cubic feet of material when filled according to the provider’s loading requirements.
These dumpsters are generally designed for high-volume debris rather than ordinary household garbage. They are especially useful for projects where materials are being removed continuously over several days.
Common applications include:
- Whole-house renovations
- Large-scale demolition
- Commercial remodeling
- Roofing projects
- Office and warehouse cleanouts
- Estate cleanouts
- Property renovations
- Large landscaping projects
- Construction and renovation debris
The container’s actual dimensions can differ, but many 40-yard dumpsters are roughly 20 to 22 feet long, 7 to 8 feet wide, and 4 to 8 feet high.
How to Decide if You Need a 40 Yard Dumpster
Choosing a dumpster based only on the size of the project can lead to either wasted capacity or unnecessary expense. Instead, estimate the volume and type of debris you expect to generate.
1. Estimate the Amount of Debris
Start by considering how much material will actually leave the property. A complete kitchen renovation may generate cabinets, flooring, drywall, countertops, and packaging. A demolition project can produce substantially more.
For example, imagine a contractor is removing drywall, flooring, cabinets, and non-structural interior materials from several rooms. If the debris will be generated continuously, a 40-yard container may reduce the need for multiple smaller containers.
When estimating, remember that debris often takes up more space than the original materials because demolition creates irregular pieces and gaps.
2. Consider the Material
Volume isn’t the only consideration. Weight can become the limiting factor with dense materials.
Concrete, brick, soil, asphalt, and roofing materials can become extremely heavy. A large container may have plenty of physical space but still exceed its permitted weight if loaded with dense debris.
For mixed renovation debris, the container’s volume may be more important. For heavy construction materials, ask the rental provider about weight limits before ordering.
3. Check the Loading Requirements
Dumpster capacity does not mean you can fill the container above its walls. Overloading can create transportation hazards and may require the renter to remove excess material before pickup.
A good rule is to keep debris level with the top of the container. Bulky items should also be broken down when possible to make better use of the available space.
Step-by-Step Guide to Renting a 40 Yard Dumpster
Step 1: Define Your Project
Write down what you are removing and approximately how much material you expect. Separate heavy materials from lightweight debris because weight restrictions may affect your choice.
Step 2: Confirm Accepted Materials
Rental companies often have restrictions on hazardous, toxic, flammable, or otherwise regulated materials. Items such as certain chemicals, paints, batteries, tires, and appliances may require separate disposal.
Never assume that everything generated during a cleanup can go into the dumpster. Confirm the rules before loading begins.
Step 3: Choose the Placement Area
The dumpster needs a stable, accessible surface. A driveway, paved parking area, or suitable section of private property is often preferable.
Measure the available space before delivery. Account for the dumpster’s length and width, as well as the clearance needed by the delivery truck.
If the container will be placed on a public street or other restricted area, check whether a permit is required.
Step 4: Plan the Rental Period
Estimate how long the project will take, including potential delays. Renovation projects frequently encounter unexpected issues, such as weather, material deliveries, or additional demolition.
Ask about the included rental period and what happens if you need the dumpster for longer than originally planned.
Step 5: Load Efficiently
Break down large cardboard boxes, cabinets, furniture, and other bulky items when practical. Distribute debris throughout the container rather than creating one large pile in a single location.
This approach improves available space and can make the load safer to transport.
Common Mistakes and Challenges
One of the most common mistakes is choosing a dumpster based solely on price. A cheaper smaller container may require multiple pickups, increasing the overall cost and disrupting the project.
Another mistake is ignoring weight restrictions. A container filled with lightweight renovation debris behaves very differently from one loaded with concrete or soil.
Placement can also cause problems. A dumpster that blocks a garage, driveway entrance, fire lane, or work area can interfere with daily operations. Before delivery, consider how workers and vehicles will move around the property.
Finally, failing to understand prohibited materials can create disposal issues. Reviewing the rental agreement beforehand is much easier than sorting restricted items after the dumpster is full.
Practical Tips for Better Dumpster Planning
Create a debris estimate before ordering. Walk through each project area and identify what will be removed. Estimating by room can provide a more realistic picture than making a general guess.
Separate recyclable materials where practical. Metal, cardboard, and certain construction materials may have recycling options. Removing recyclable items can reduce the amount of waste entering the dumpster.
Schedule delivery around your work. Ideally, the container should arrive shortly before substantial debris generation begins. Having it delivered too early can unnecessarily occupy valuable space.
Protect the placement surface. Depending on the surface and rental company’s procedures, boards or protective materials may help reduce the risk of surface damage. Confirm acceptable protection methods with the provider first.
Keep prohibited materials separate. Set aside anything that requires specialized disposal from the beginning. This prevents accidental mixing with ordinary construction debris.
Think about access before filling the container. If workers need to move equipment through the same area, avoid positioning debris in a way that creates unnecessary obstacles.
Conclusion
A 40-yard dumpster can provide substantial capacity for major renovations, demolition, construction, and large cleanouts, but selecting one requires more than estimating the amount of trash. Material type, weight limits, placement, loading practices, rental duration, and disposal restrictions all influence whether the container is appropriate.
The best approach is to estimate your debris carefully, confirm what the provider accepts, prepare an accessible placement area, and load the dumpster responsibly. With proper planning, a large roll-off container can keep debris under control and make a demanding cleanup project considerably more manageable.